3D Printed Steamroller
I recently wrote about how to build a 3D printed car. Aside from the 3D printed parts, the design required little more than readily available hobby motors, a battery pack, tires (aviation o-rings actually), and connectors to complete the circuit. It turned out to be a very simple design -- it wouldn't surprise me to see someone assemble it in five minutes or less.
Shortly after I designed that 4WD car, I volunteered to lead an group of elementary students through an introductory robotics session -- providing 12 sets of parts so that each student could build, test, and keep their own 4WD toy car. The problem? It turns out that the particular 3D printed parts that I designed for that project, led to a fairly time consuming printing project. (2 Chassis Plates + 4 Wheels) x 12 Cars = 72 printed parts.
If necessity is the mother of invention, then today's post is the invention inspired by wanting to print fewer than 72 parts. Today's 3D printed steamroller involves only three 3D printed parts per toy, in addition to a minimal selection of readily available materials:
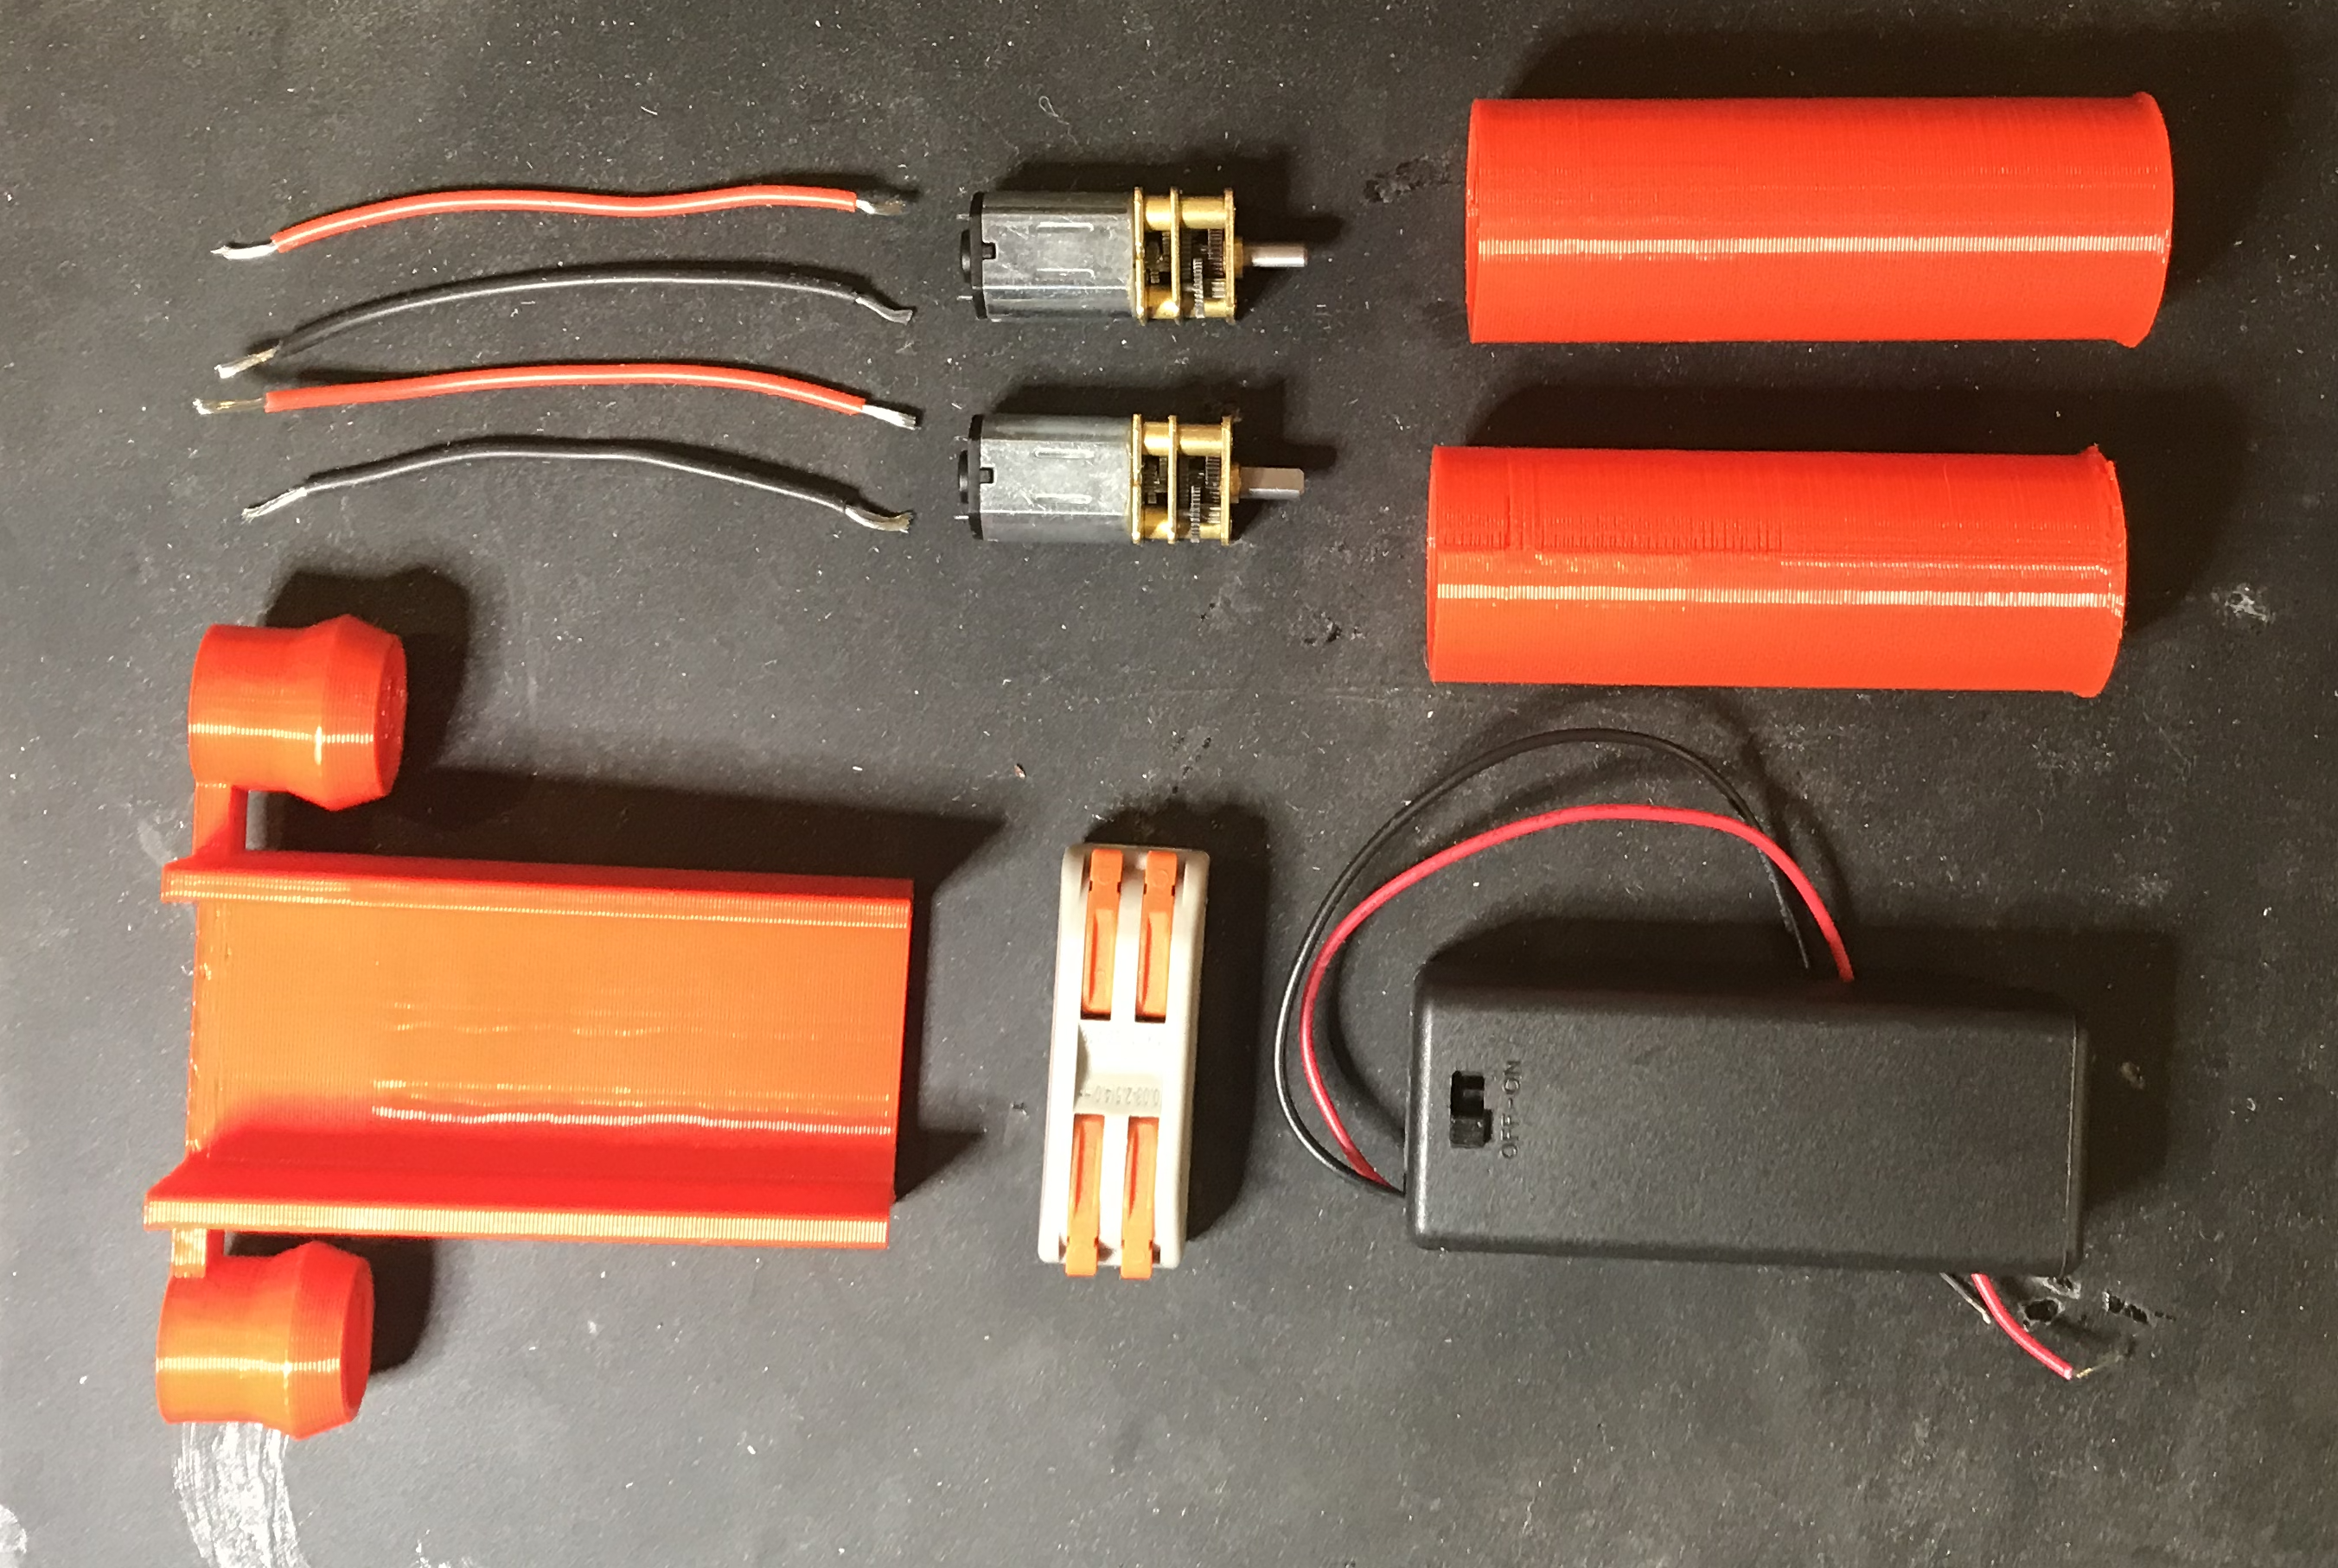
Materials
- Motors: two N20 motors with attached 60 RPM gearboxes.
- Power: one battery pack connecting two AAA batteries in series.
- Connectors: one lever-nut connector (2 circuit type) if trying to minimize soldering; or, a soldering iron and some type of insulation to cover the open wires (electrical tape or heat shrink)
- 22 AWG Wire Scraps: approximately 4 inches of red, and 4 inches of black wire -- trimmed into 2 inch pieces.
3D Printed Components
When I designed this project to sparingly use only a minimum of 3D printed parts, I decided not to sacrifice the notion of having this toy powered both on the rear wheels (well, roller really) and the front roller. So, this project involves two powered "rollers" and a chassis.
My theory was that each of the rollers (cylindrical) could have a cavity the size of an N20 motor, and a shaft hole the size of the N20 Motor's D-Shaft. Using this theory, I believed that motors could be made to press firmly into each roller -- exposing only their +/- terminals on an "open" end of the roller. Theory became reality, through the following 3D parts that I designed in Blender [STL files updated on February 4, 2020]:
| Component | Renderings | STL File Download |
| Roller (Print 2x) |  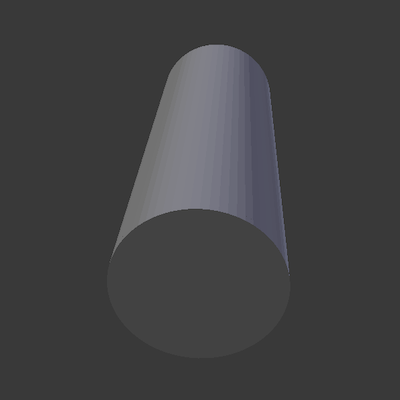 | Download STL |
| Chassis (Print 1x) | 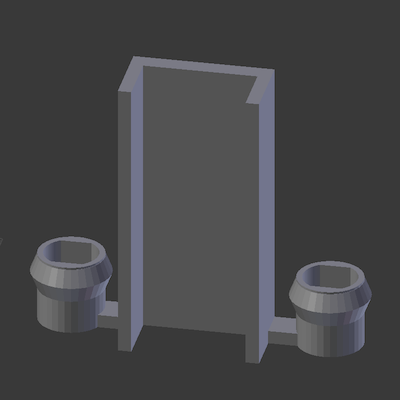 | Download STL |
Assembly Instructions
For this particular project, I was unable to find any commercially available N20 motors that had red/black wires (leads) pre-soldered; whereas, the more conventional Size 130 motors are plentifully available with pre-soldered leads. Because this project's scale worked better with N20 motors, this project is going to involve some soldering.
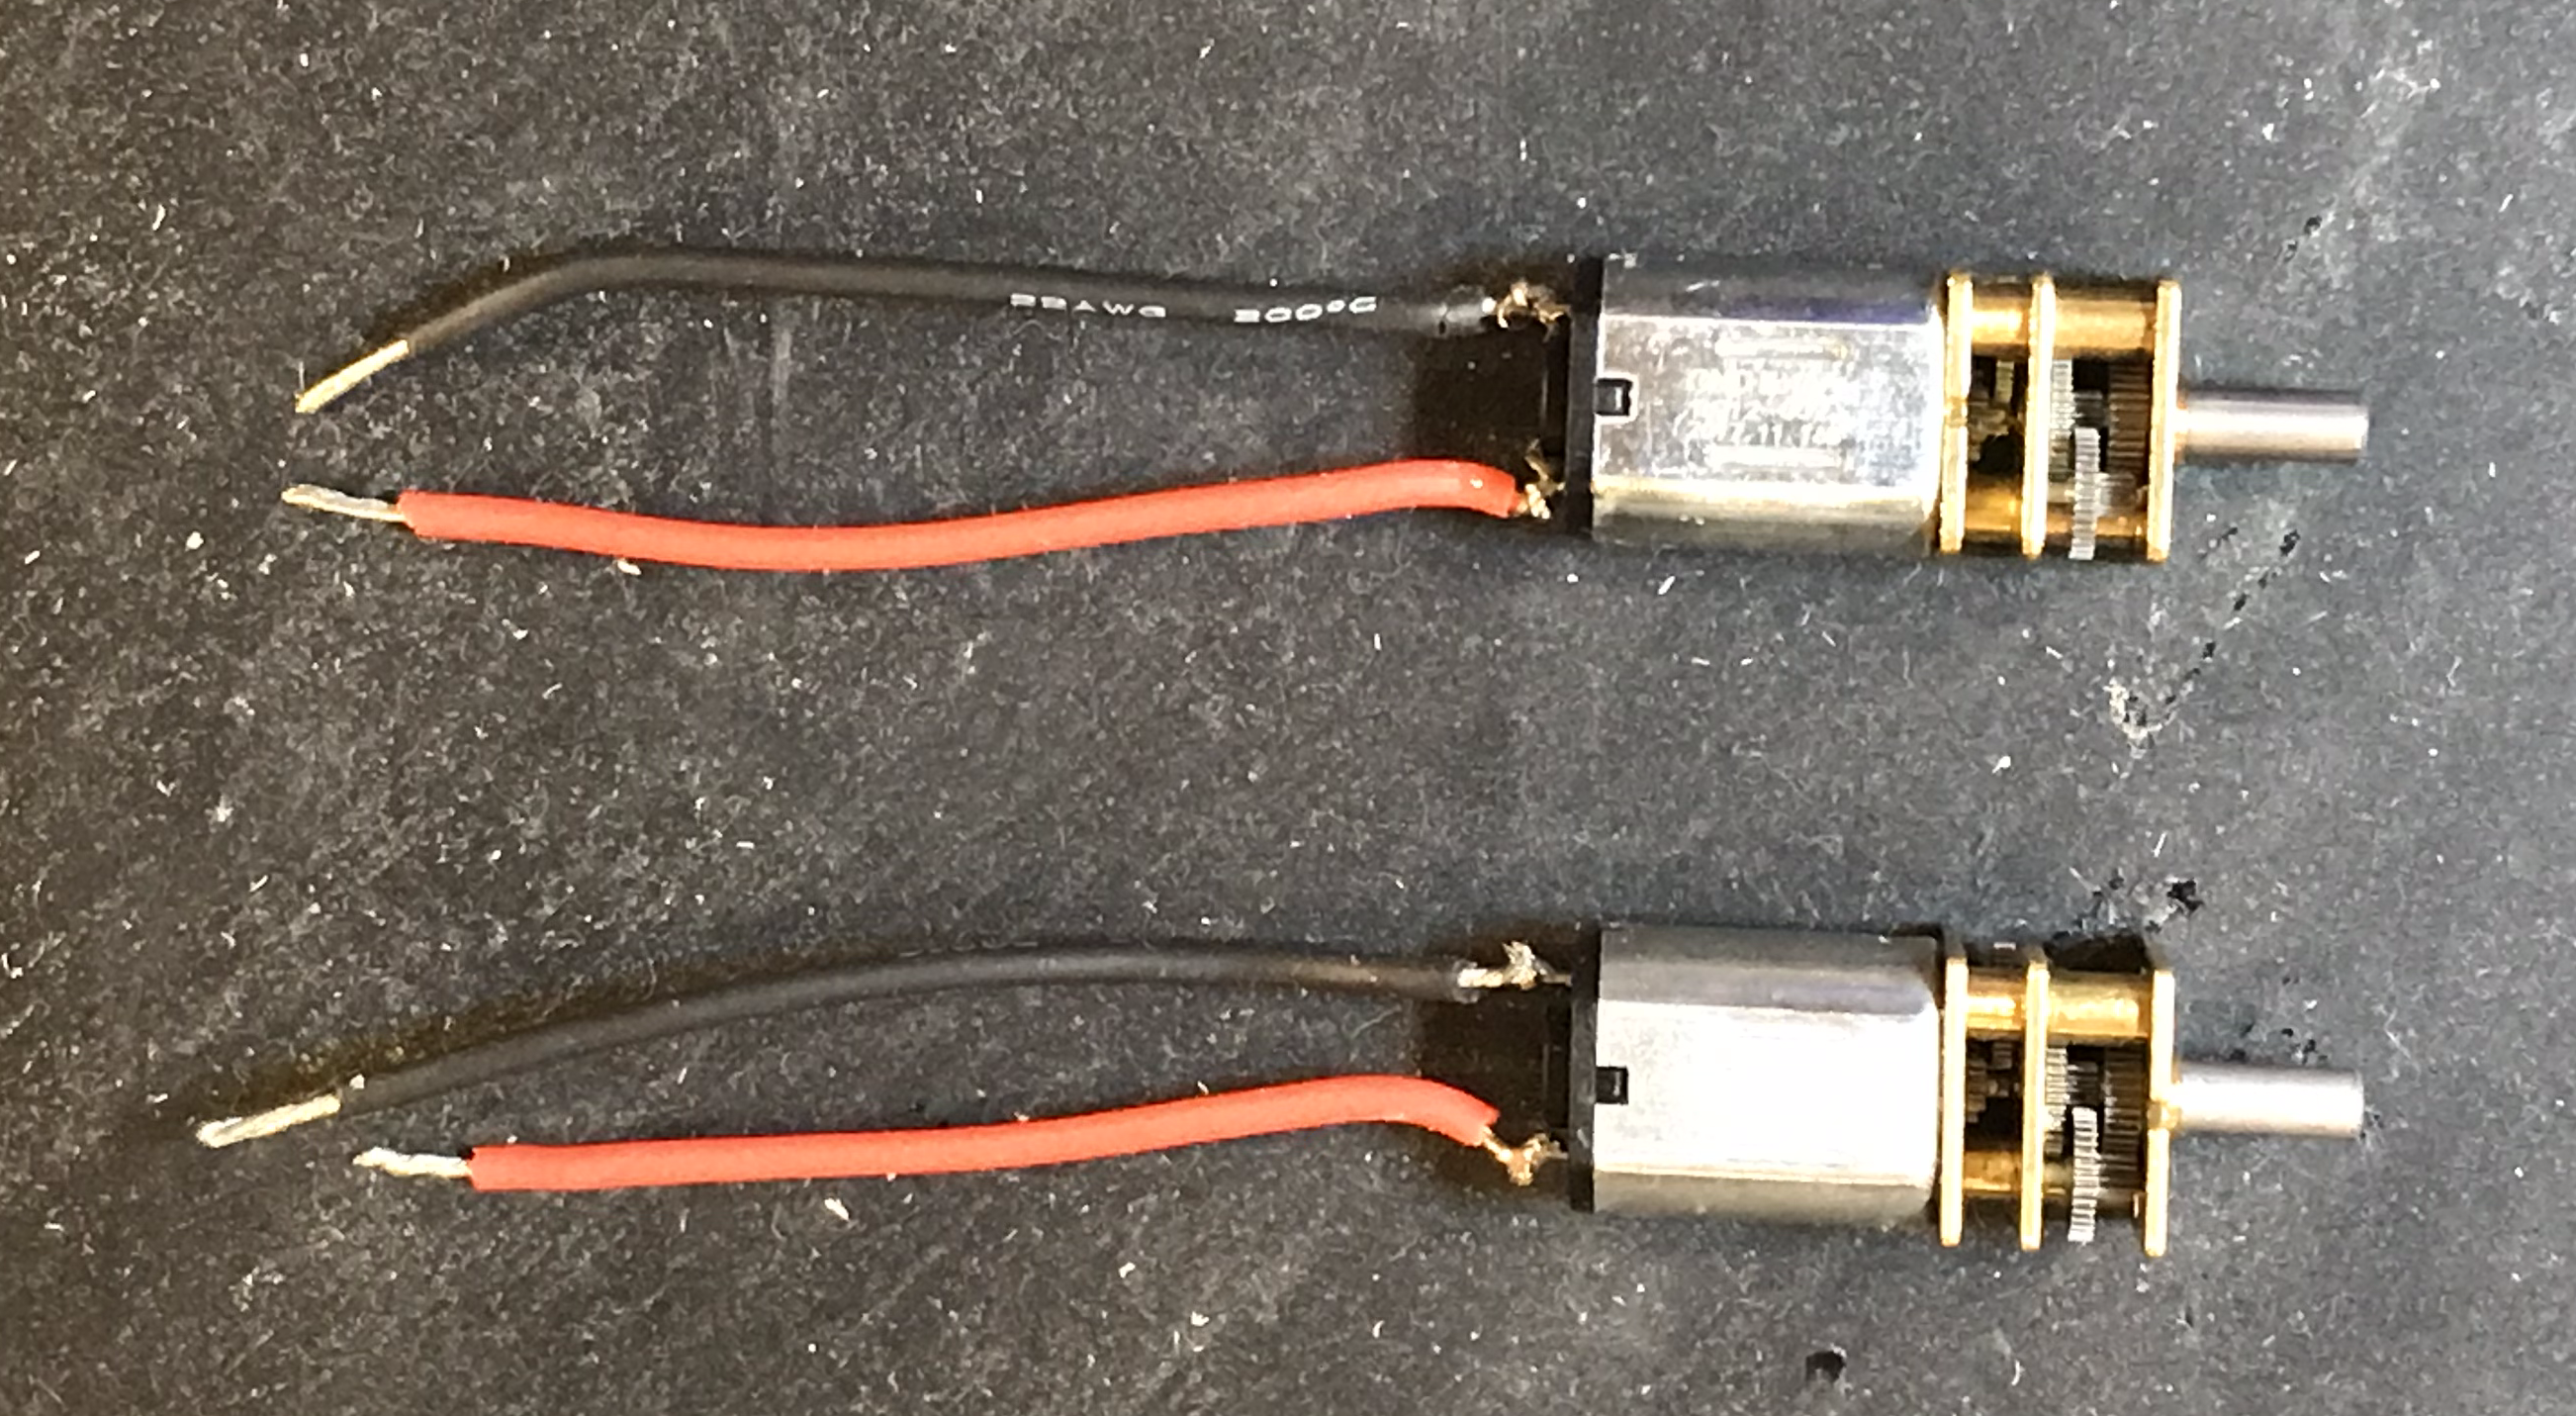
Step 1: Solder Leads to N20 Motors
Solder red and black leads (shoot for 2" leads, but precision is not crucial) to the N20 motor tabs; taking care to solder the red wire to the "+" terminal on the motor:
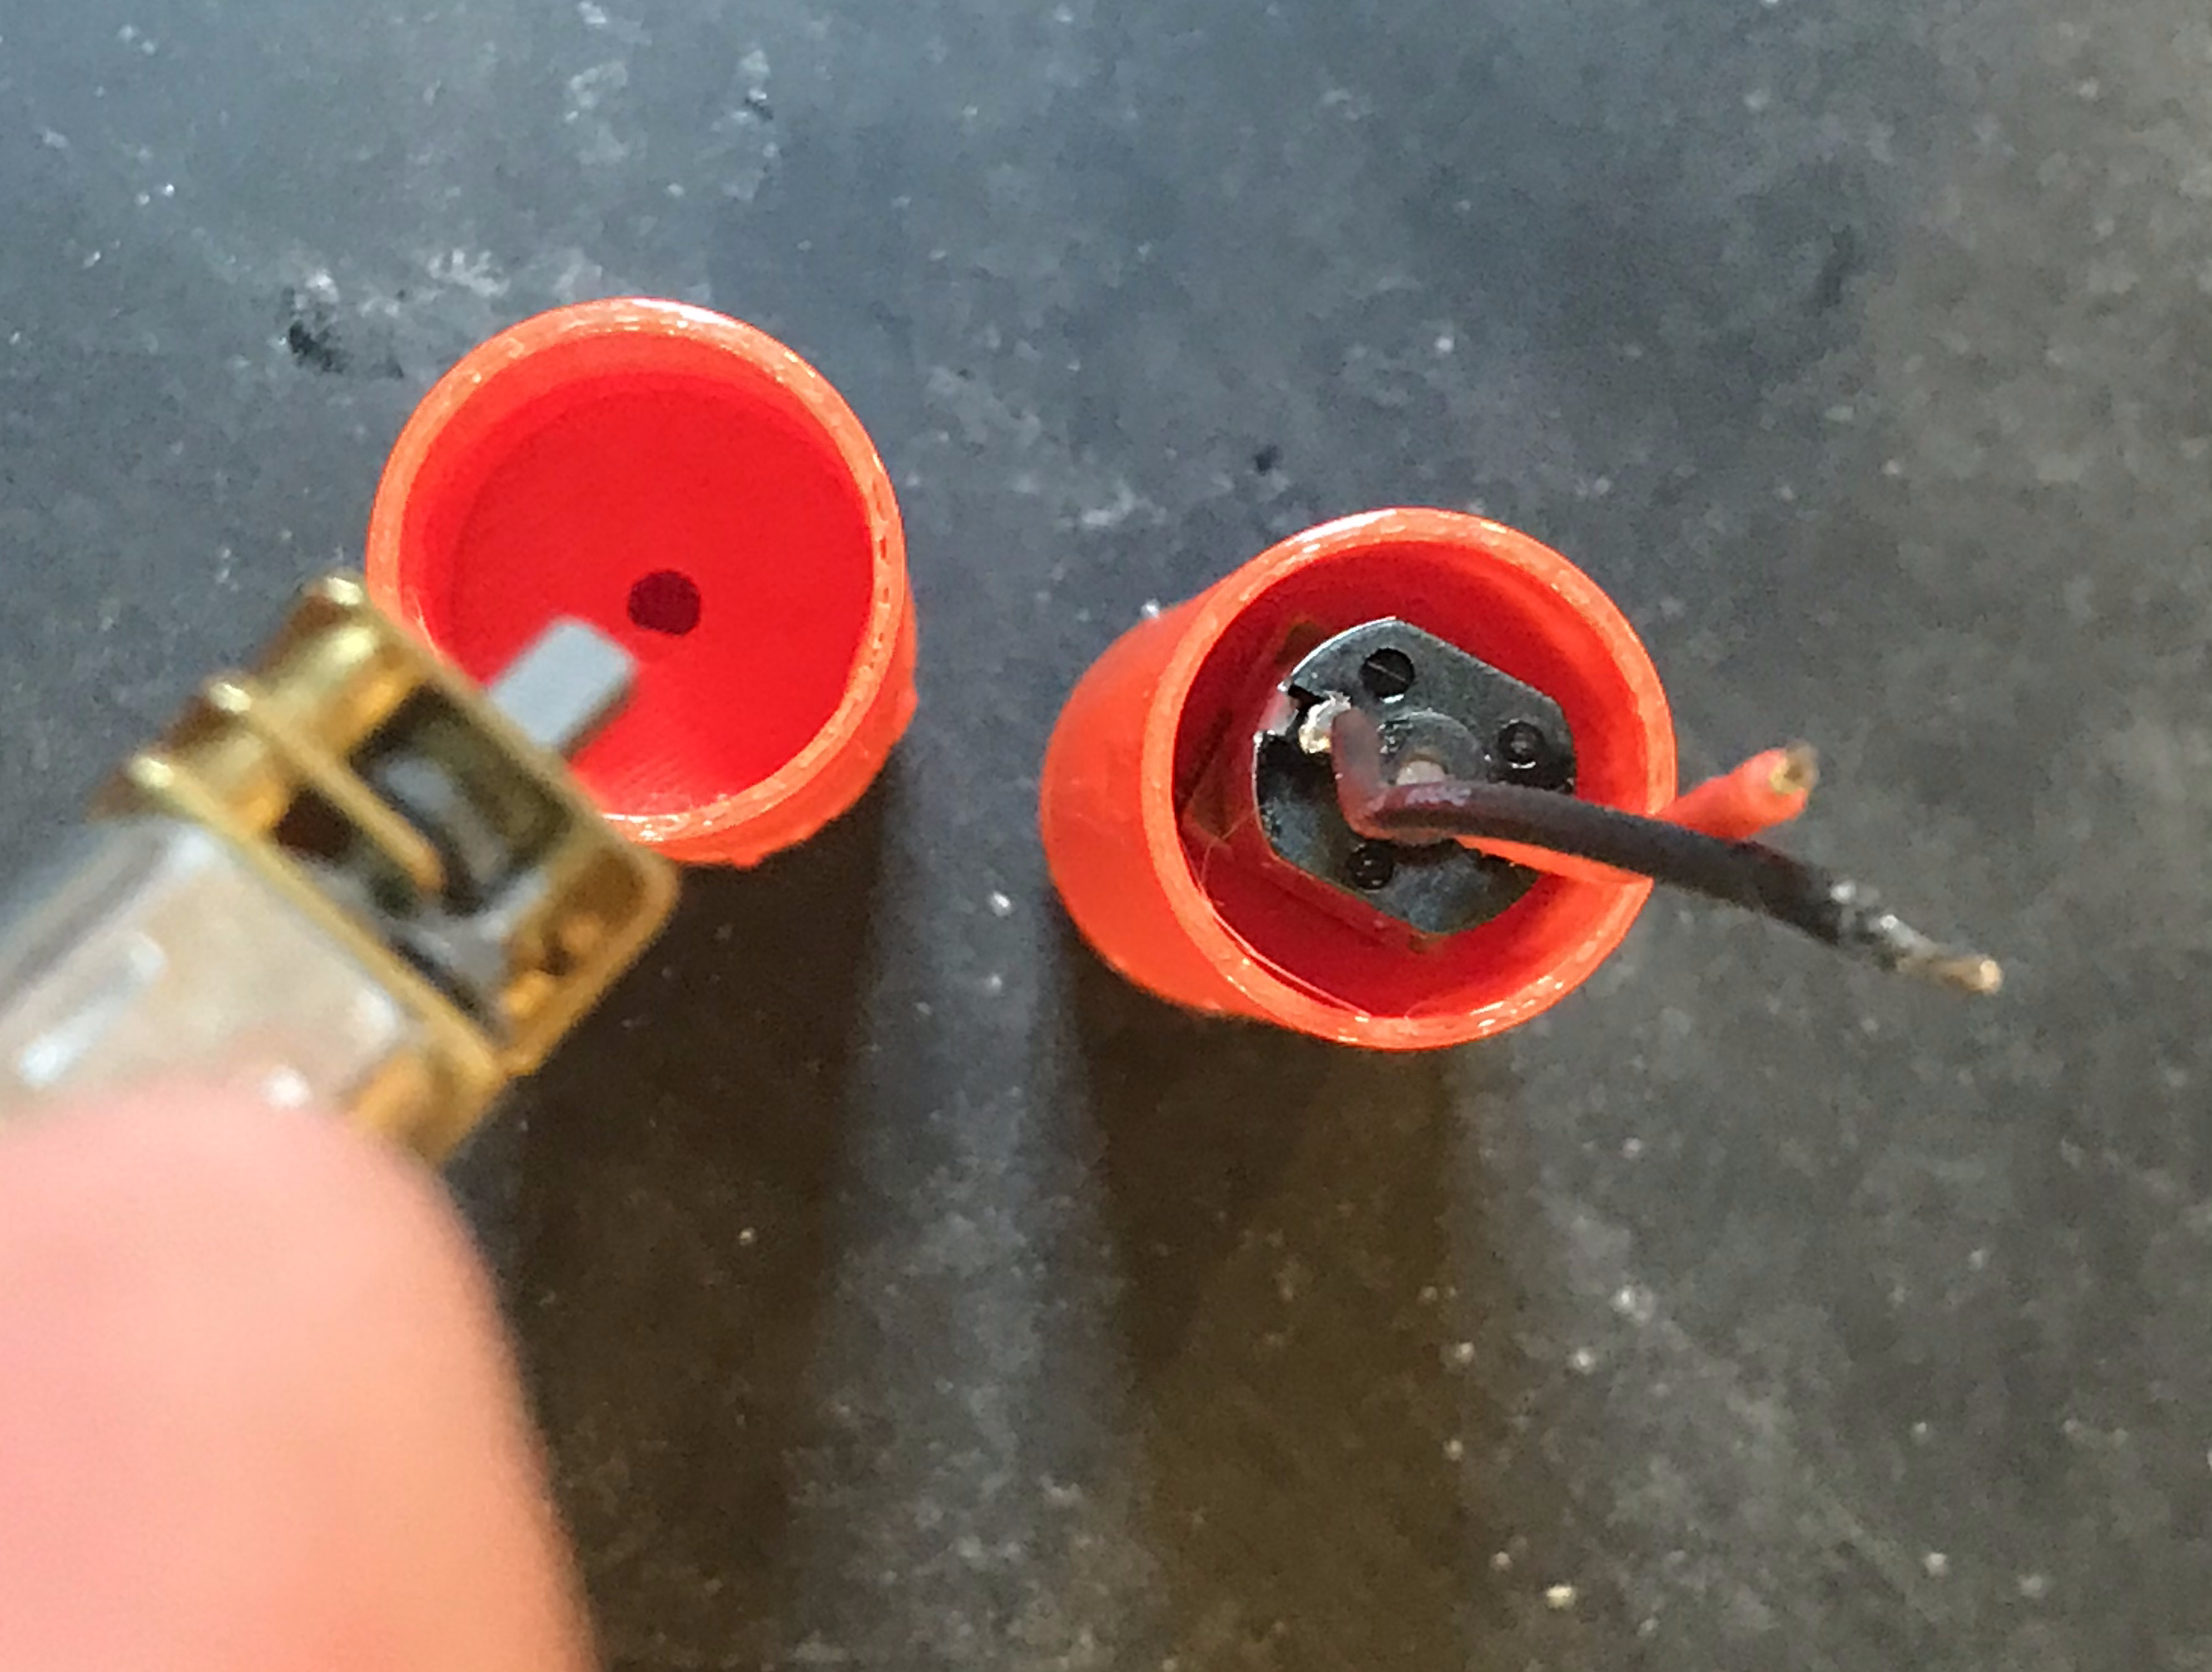
Step 2: Slide Motors into Rollers
Taking the two identical 3D printed rollers, slide the motors into the rollers, shaft first. You should observe that the shaft slides tightly into a D-Shaft receiver in each roller:
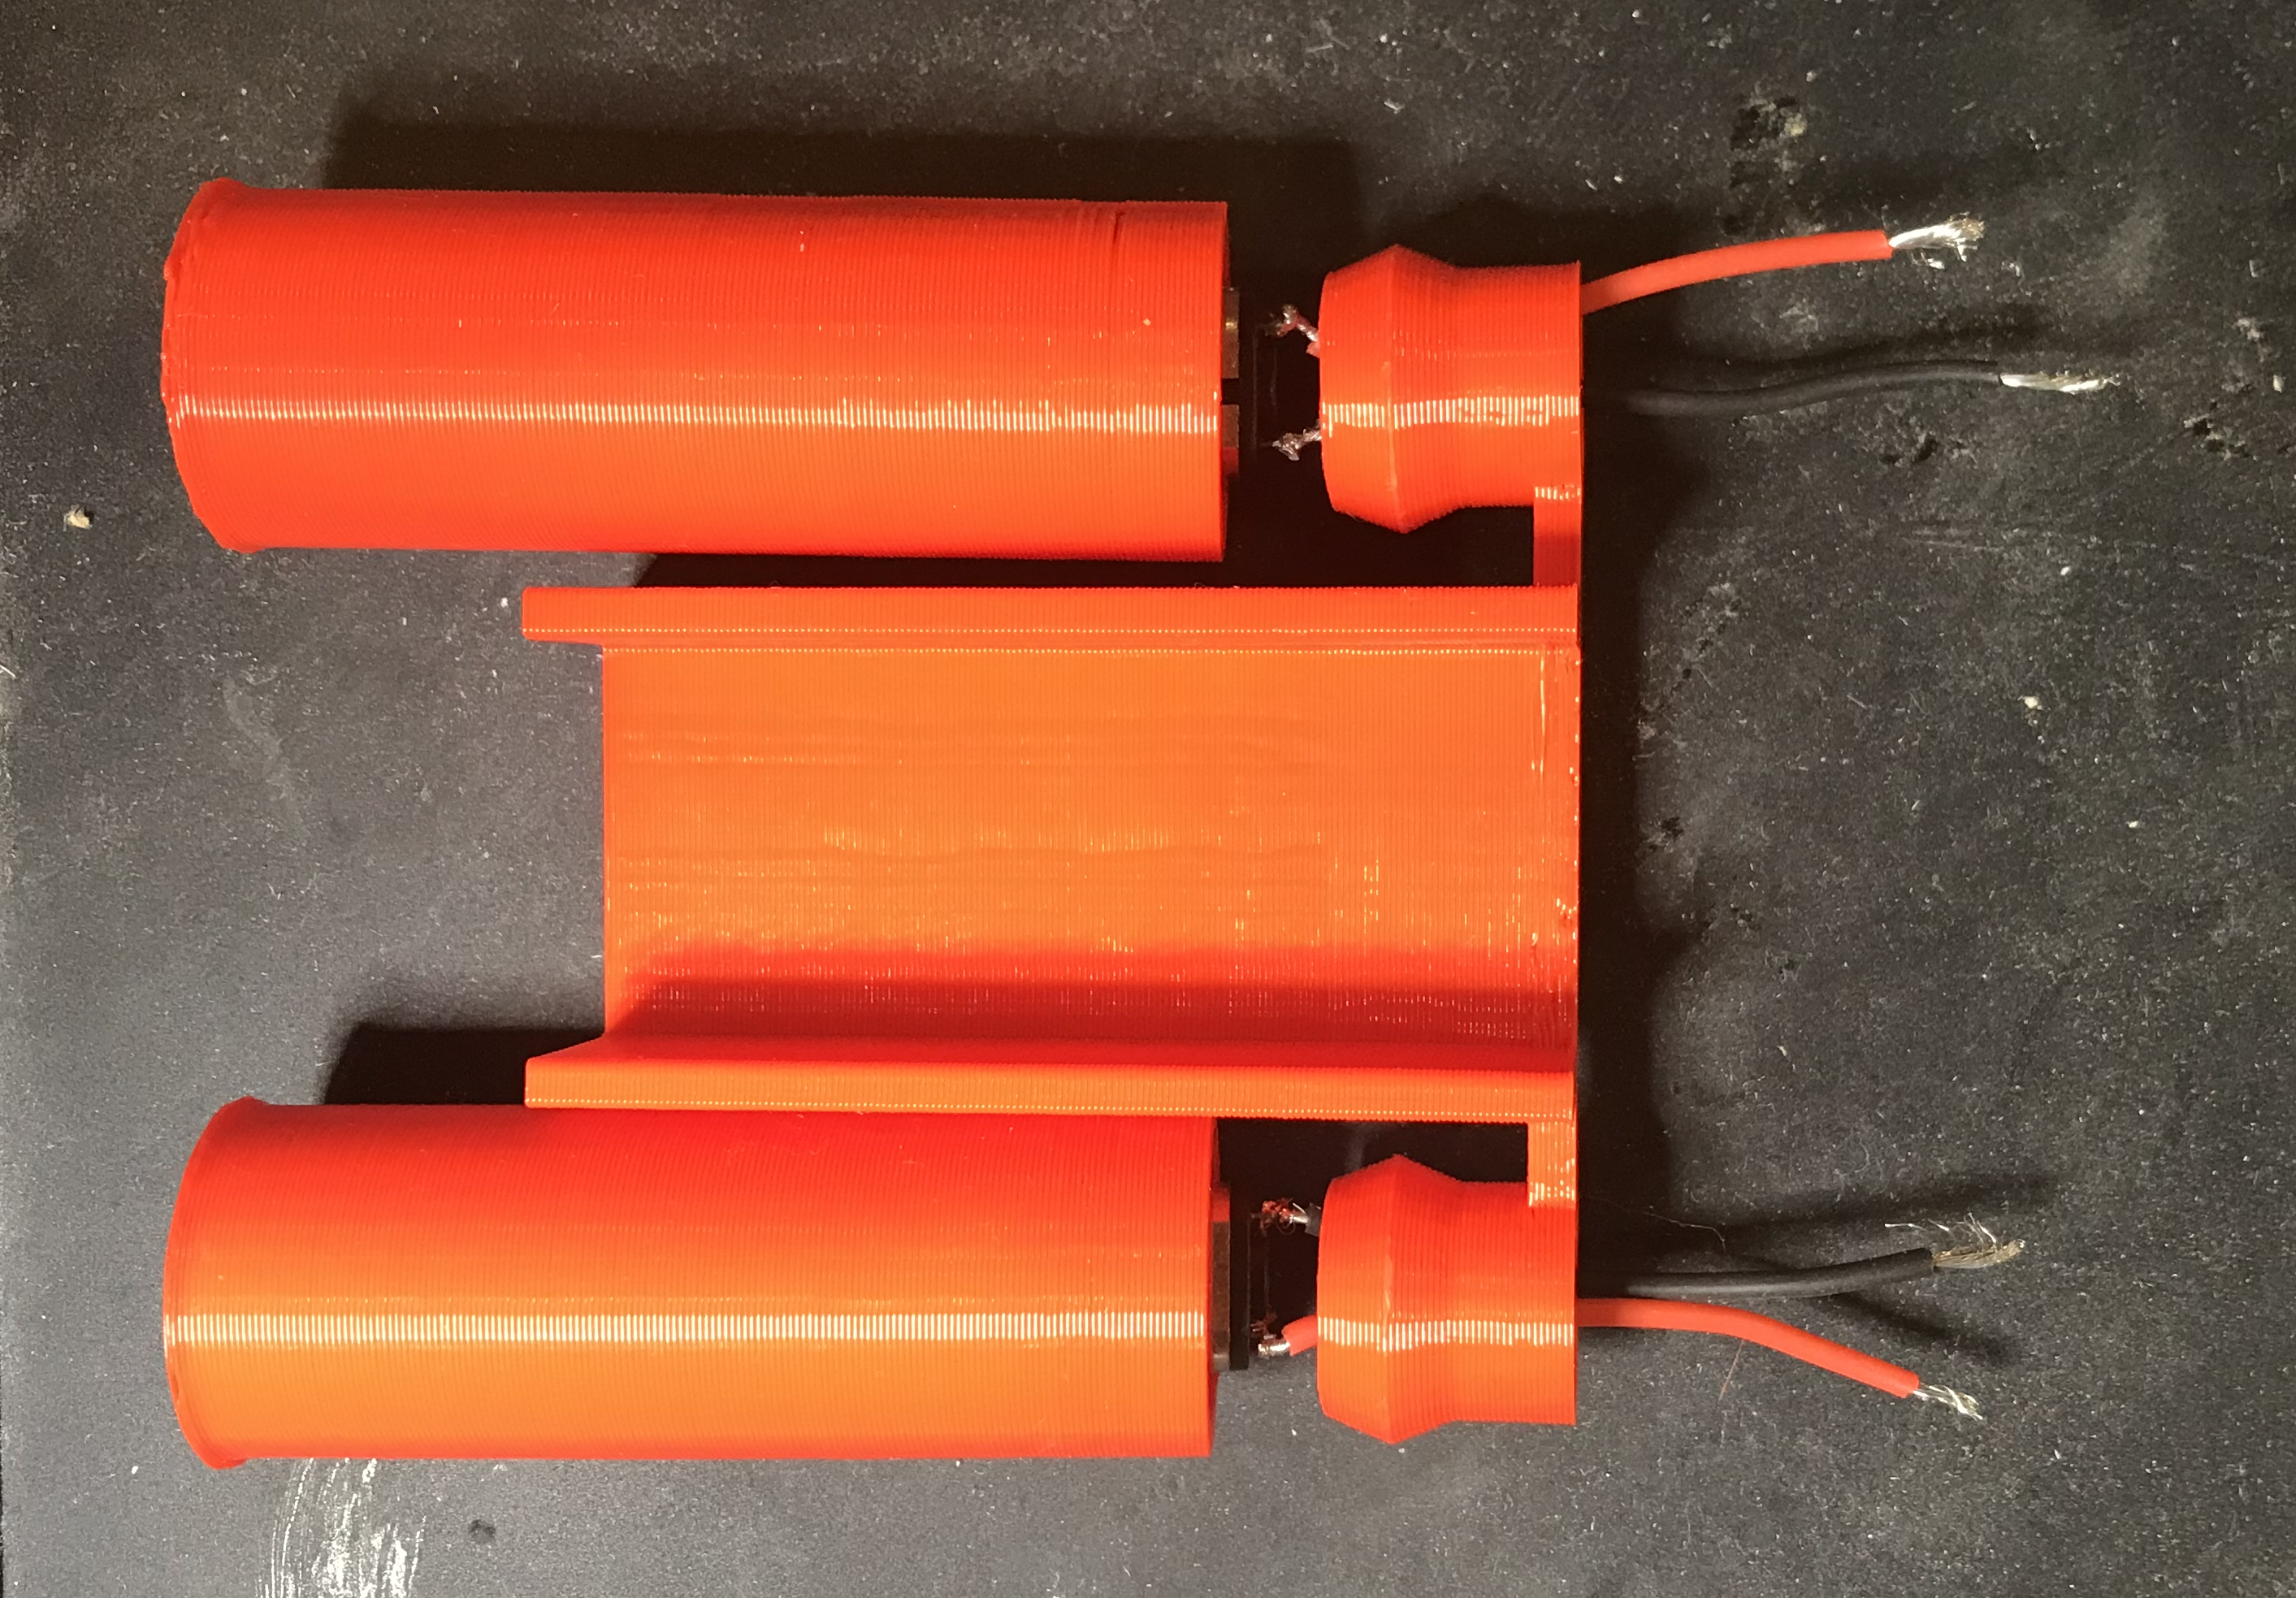
Step 3: Feed Motor Leads through Chassis
With two rollers -- each with N20 motors encased therein -- it's time to begin the process of fitting the rollers to the chassis. Start by feeding the motors' lead wires through the chassis like this:
Step 4: Firmly Press Rollers Onto Chassis
A crucial element of this design, is that the chassis is designed such that the motor's non-shaft end fits snugly into the part of the chassis that you previously fed the motor leads through. Press the roller/motor combo into the chassis such that the N20 motors' non-shaft end nests snugly into the chassis:
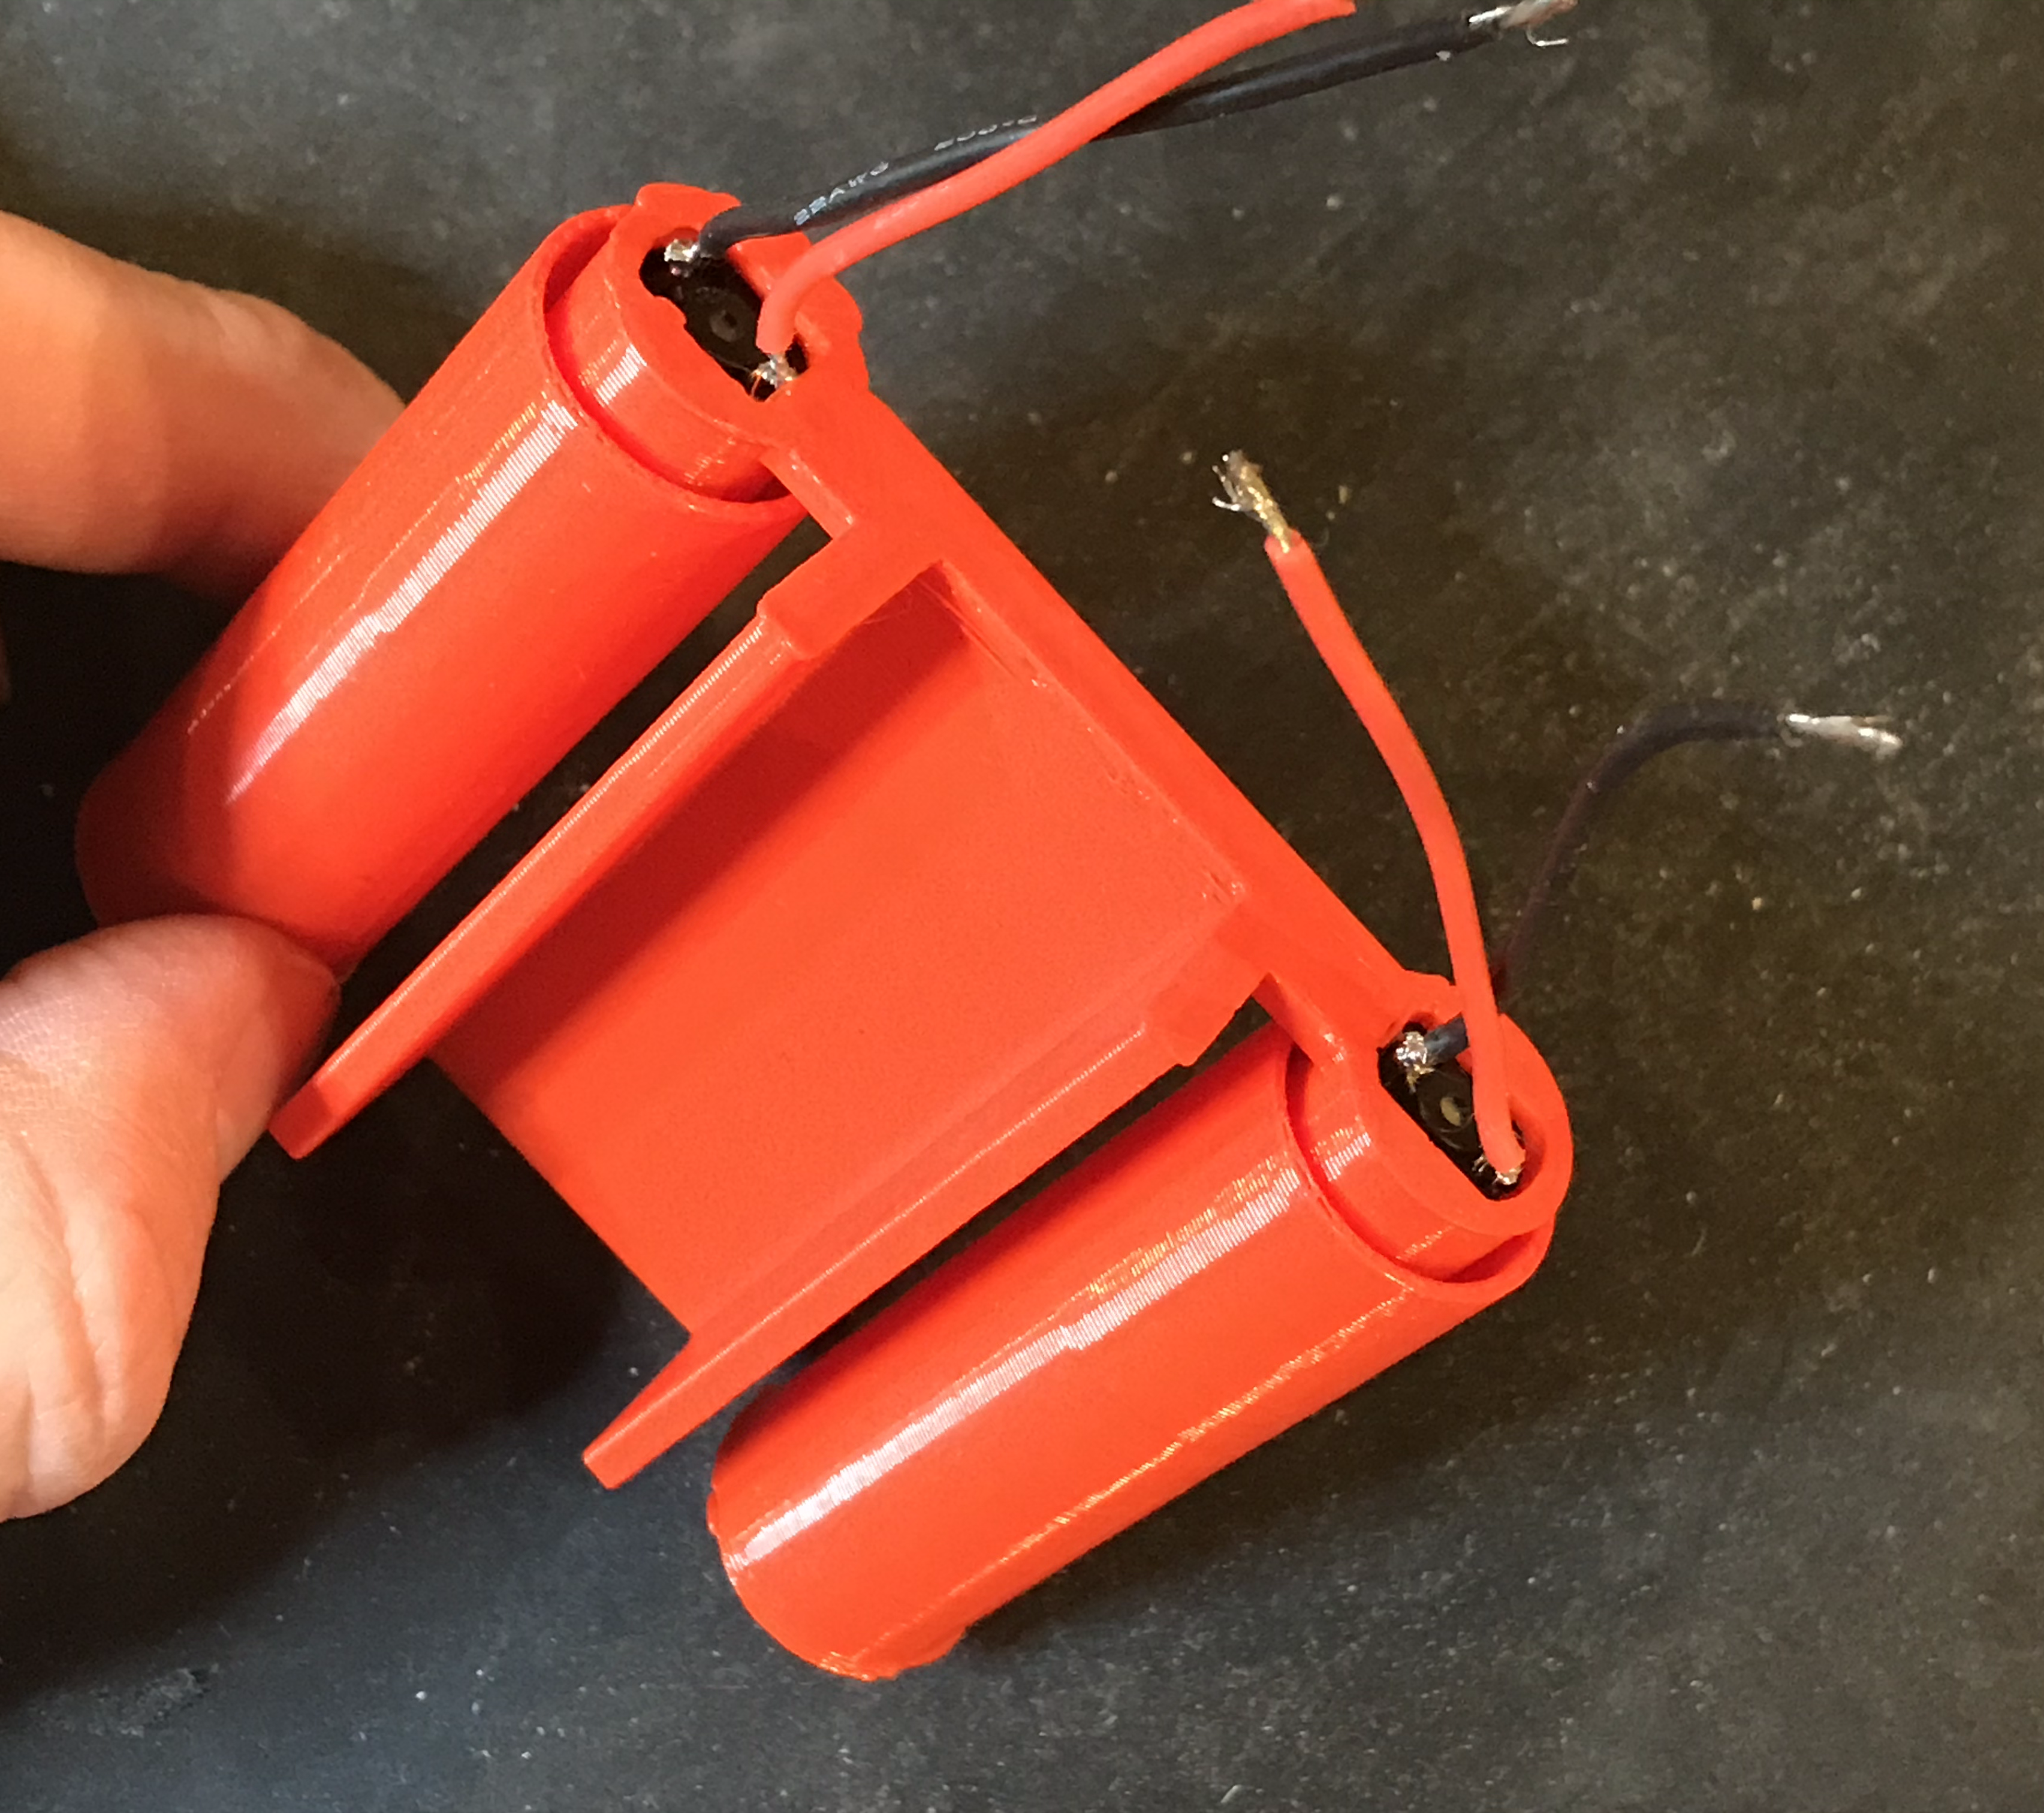

It's conceivable that depending on your 3D print settings, this step might involve some fiddling -- you might find yourself having to press very firmly to get the motor's non-shaft end to fully seat in the chassis.
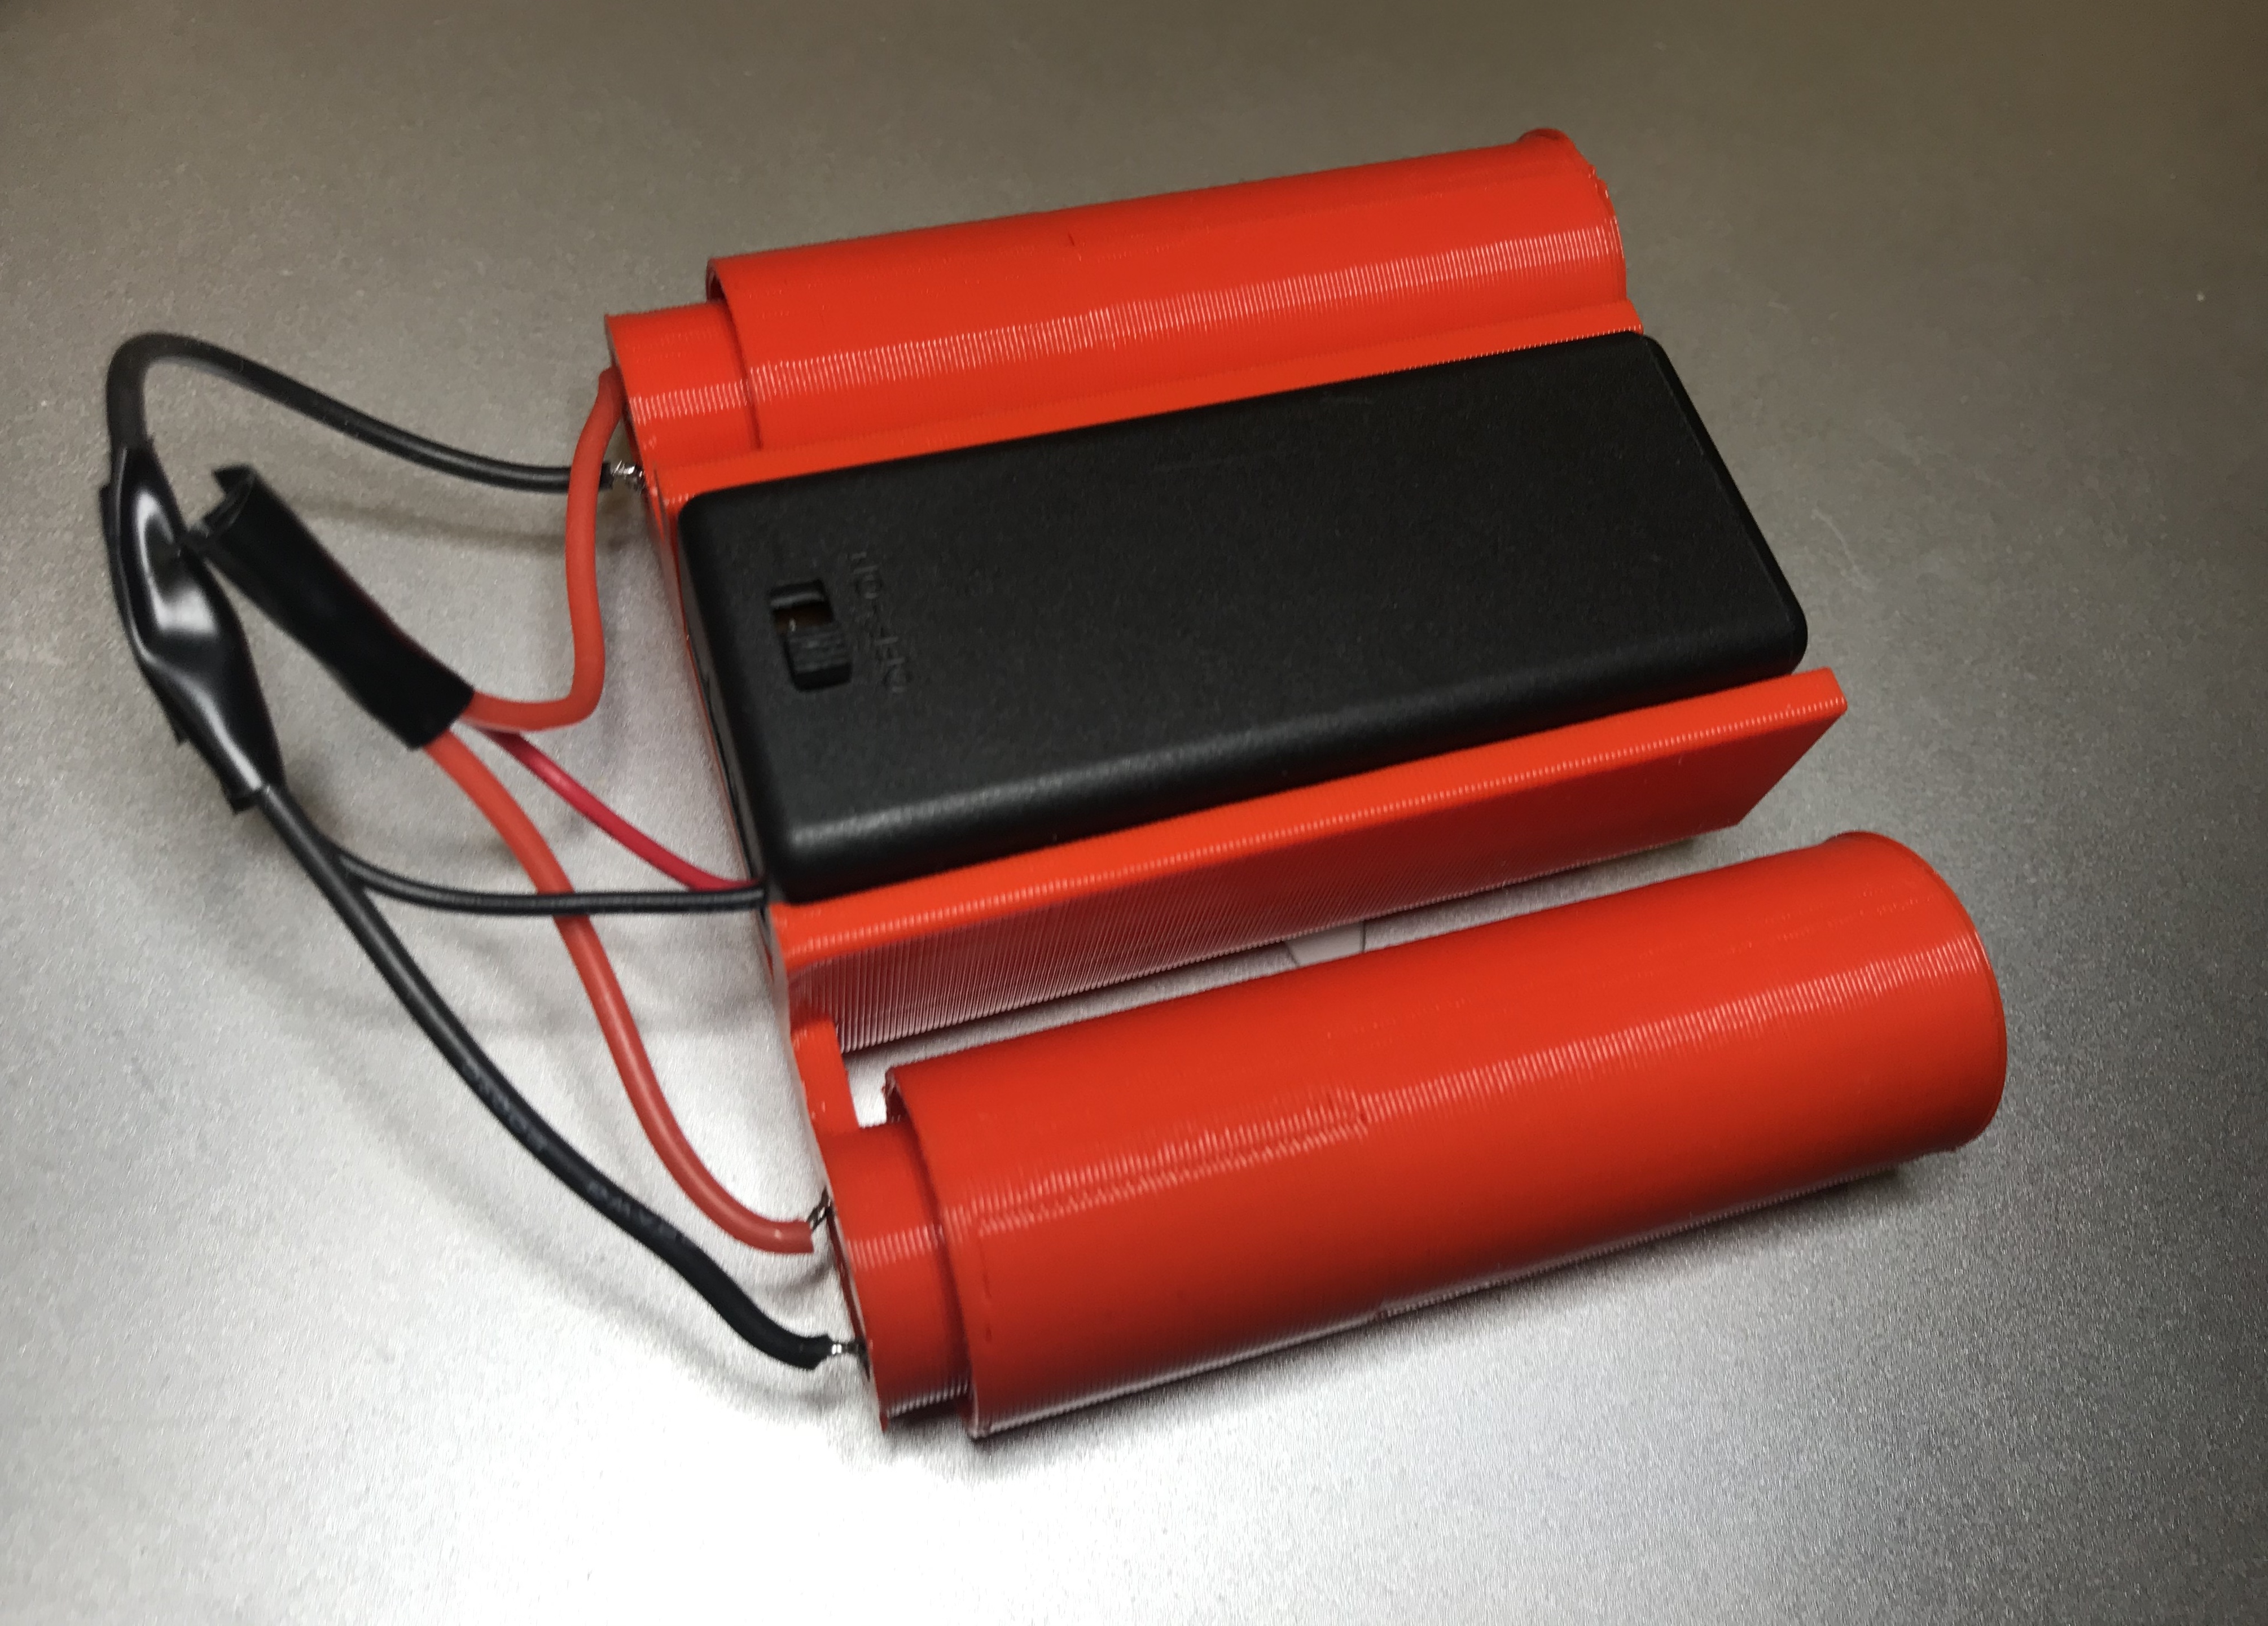
Step 5: Complete the Circuit
It's time to seat the battery pack into the chassis, and to wire red-red-red and black-black-black wire combinations. Here, you have options -- you could solder the red-red-red wire combination together and insulate with heat shrink (preferred) or electrical tape (temporary). Or, you could use the lever-nut included in the materials list. Since I already had my soldering setup at the ready from soldering the red and black wires to the motor tabs, I decided to solder:
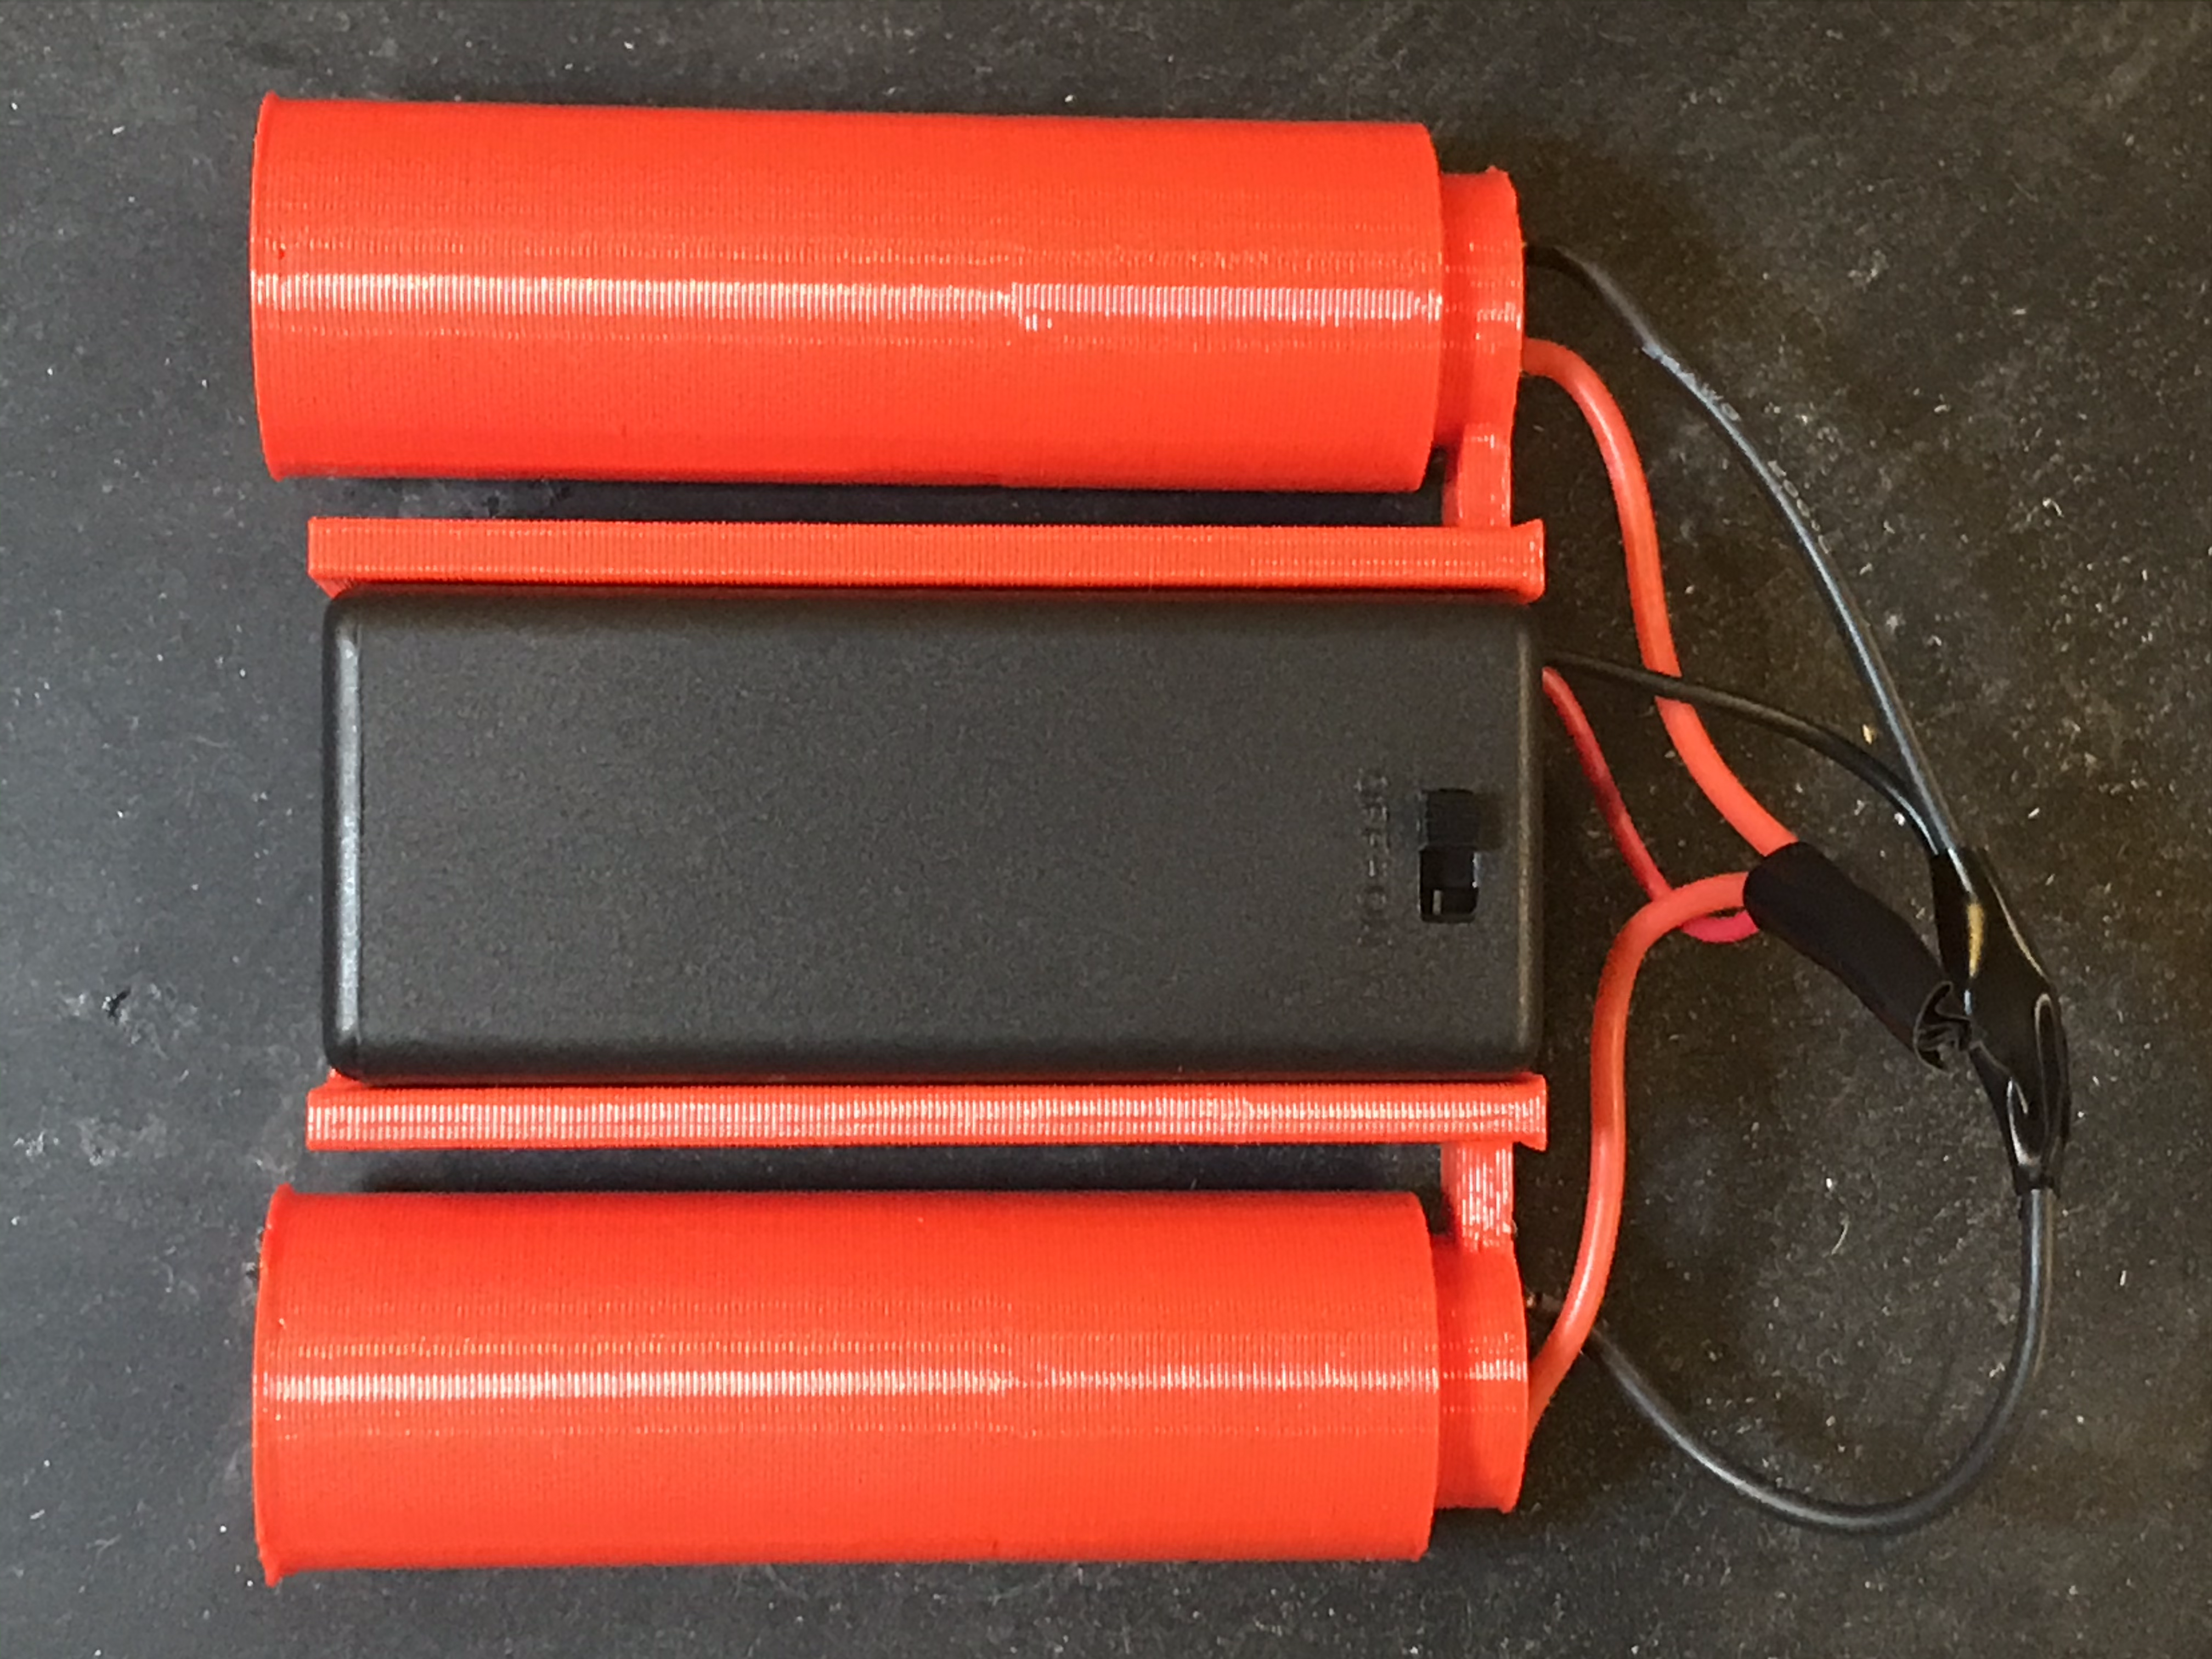
After (and only after!) you complete the soldering step, pivot the battery pack up, slide open the bottom, insert the batteries, and re-seat the battery pack. You should now be able to power on the steamroller and watch it in action:
Conclusions & Possible Improvements
I found that the time that it took to print out the components for this project was much faster than the printouts required for the 4WD Toy Car project -- which made for a less time-consuming build. This steamroller project does rely on the "snugness" of a couple 3D part fits -- specifically, the snugness of the D-Shaft in the roller's D-Shaft receiver, and the snugness of the N20 motor's back in the chassis. In a future iteration of this project, I'd love to find some way to mitigate the project's sensitivity to those fits -- since printout quality varies across different 3D printers and filaments. However, with my Lulzbot Mini, this project printed great and all of the parts fit snugly.
I had a lot of fun designing, printing, assembling, and testing this 3D printed steamroller -- I hope you'll try it as well. For now, I'm glad to have #justbuiltit -- and I'm thinking about the next project waiting in the wings!